
(En español: https://www.ibidem-translations.com/edu/traduccion-non-max-supression/)
I’ve been working with neural networks to do image recognition for almost a decade now, but I have to admit I never really understood the details of how they output things like bounding boxes. I didn’t have a good mental model for how it all worked, and the reference functions always seemed pretty intimidating. In a lot of cases this doesn’t matter, the conversion process is handled by internal layers inside a model, and the application developer doesn’t need to worry about what’s happening under the hood. Recently though, I’ve begun working with some networks that expect the conversion to be handled externally, and so I’ve been writing code from scratch to perform the translation.
That has forced me to understand the details, and to make sure I have a good grasp, and have something to refer to in the future, I’ve put together this blog post and a Python Colab demonstrating it all, step by step. I’m using an example model from the awesome MediaPipe framework (which handles all the conversion itself, if you’re on a platform that supports it), and I’ve written reference code to explain the workflow to get from raw tensors to a cleaned-up set of bounding boxes. In particular, I feel like I’ve finally got a handle on “non-max suppression”, which turned out to be less intimidating than I’d feared.
How do they Work?
I recommend working through the Colab to get the best understanding, but the summary is that most neural networks designed to produce bounding boxes use a grid of anchor points across the image as a base. Each anchor point is associated with a score value, along with x and y offsets, width, height, and any other feature coordinates (like nose or eye positions). All of these coordinates are output relative to the anchor points, normalized between 0.0 and 1.0, where 1.0 is the image size. There is one score, and one set of coordinates for each anchor point, so in the case of the face model I’m using in the notebook, there are 48 columns and 48 rows of anchors, spread 4 pixels apart on a 192×192 image, which means 2,304 entries.
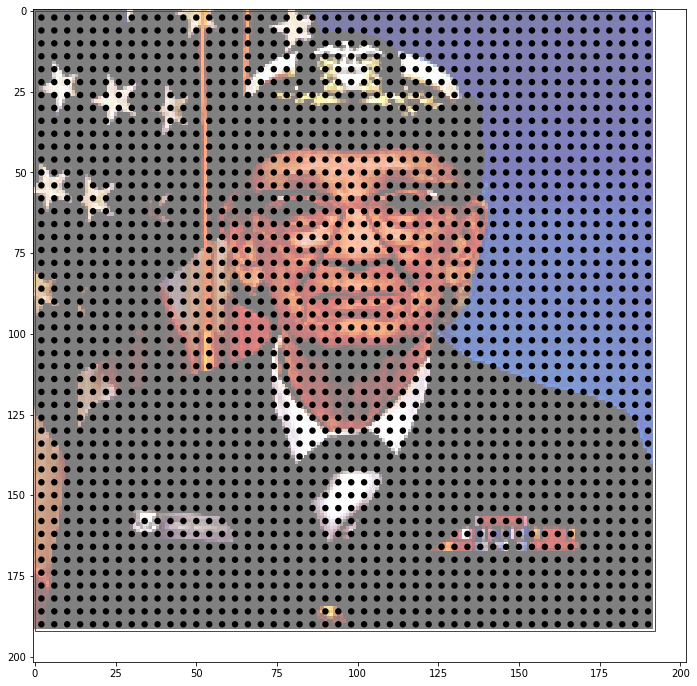
There are two outputs to the model, the first with a shape of (1, 2304, 16), holding 8 pairs of (x, y) coordinates for each anchor. The second is (1, 2304, 1) and holds the score for each anchor. For this model, the first two pairs of coordinates are the origin of the bounding box and its width and height. The other six are the positions of facial landmarks like the mouth or nose. The first stage of decoding is to turn these from relative positions into absolute coordinates by adding the corresponding anchor origins. This gives you a soup of overlapping bounding boxes, each associated with a score.

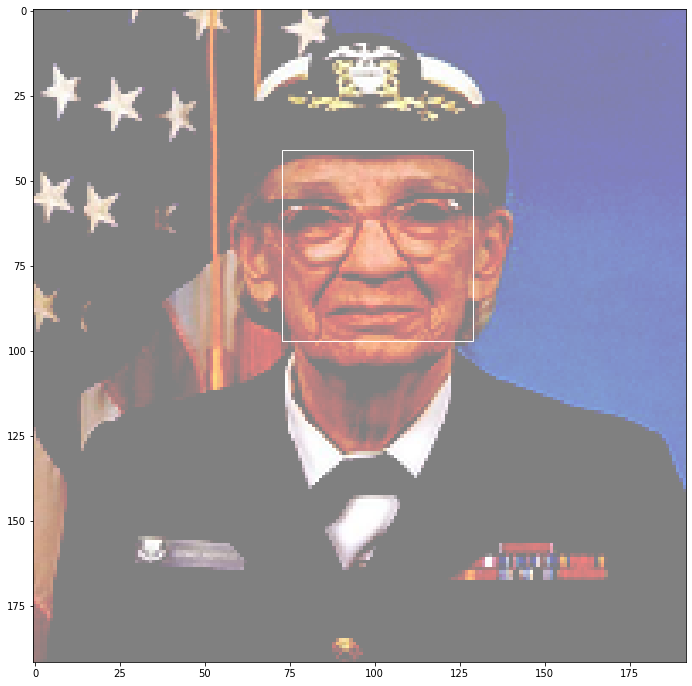
The next challenge is reducing this set of overlapping boxes into a single one for each real object detection. That’s where the non-max suppression algorithm comes in.
The initial step is to sort the boxes with the highest scores first. After that, we find all the boxes that overlap significantly and merge them together. The exact methods we use to determine if the overlap is significant can be seen in the `overlap_similarity()` function. The merging process either involves just taking the top-scoring box from an overlapping set (`unweighted_non_max_suppression()`) or averaging all the boxes and features in a set, weighted by their score (`weighted_non_max_suppression()`). And that’s how non-max suppression works!


.jpg)